Windows Image Preparation for OpenStack
Prerequisites
Windows requires the use of Scyld Cloud Workstation and cloudbase-init.
GPU Support
SCW supports the use of NVIDIA GRID SDK compatibile graphics cards for 3D acceleration.
This requires:
- an Openstack cluster, configured for GPU passthrough
- an OpenStack vmhost with a passthrough-capable graphics card
You will also need a desktop-enabled machine with passwordless ssh access to the individual nodes in the Openstack cluster, and with a working virt-manager installation.
The NVIDIA SDK drivers for Windows should also be accessible by SCP with a password somewhere on the host machine.
VM Setup
In virt-manager, add a connection to the vmhost. if not already present. (File -> Add Connection. Hypervisor QEMU/KVM, method SSH, username root).
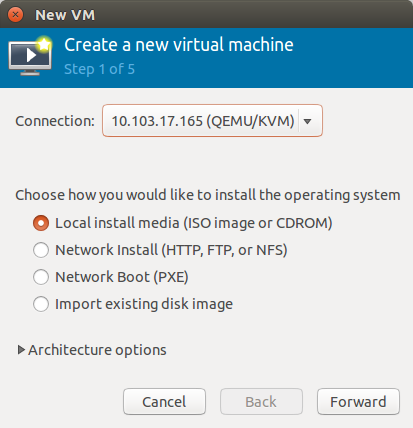
Create a new virtual machine (File -> New Virtual Machine). Select the connection corresponding to the vmhost and the “Local install media” option.
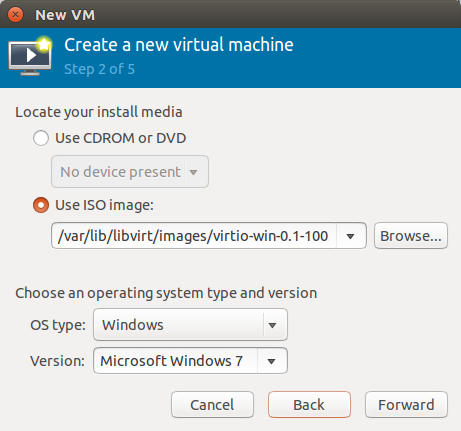
Select the virtio drivers disk. Note that we’re not choosing the actual Windows install disk, as we’ll be adding it later, and a bug in virt-manager causes it to configure new VMs to boot from whichever disk was last added. If this is fixed in future versions, then you should specify the Windows disk here and the driver disk later.
Select the appropriate Windows version.
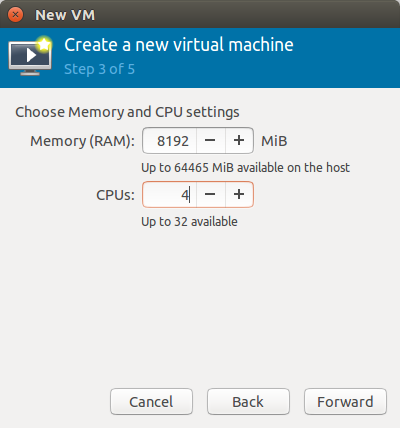
Allocate an appropriate amount of memory and number of cores. This will impact the image we eventually export; we just need enough to immediately install Windows.
At the next step, select managed or other existing storage. We’ll be allocating a new volume manually.
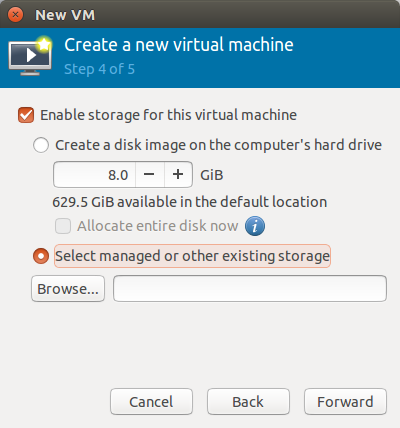
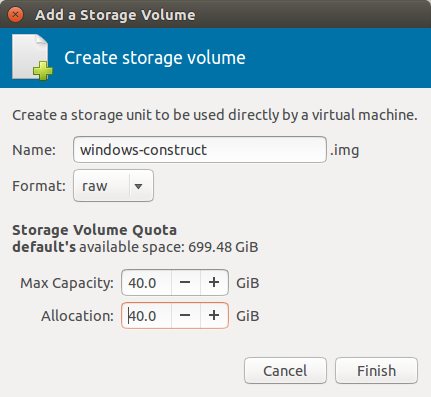
Select New Volume at the resulting screen. We’ll be creating a raw volume as it is easier to import into glance than the default qcow2. You’ll want at least 50 GB of space to hold all updates; 60 GB is advisable.
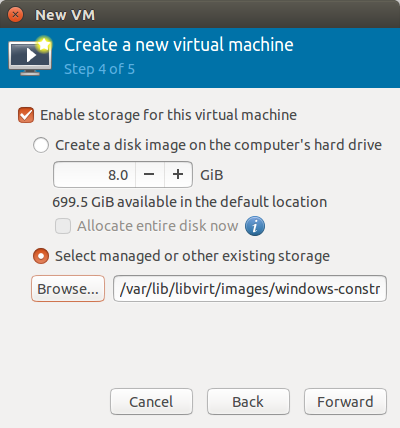
After finishing with the volume, you’ll return to the volume selection screen. Select the new volume.
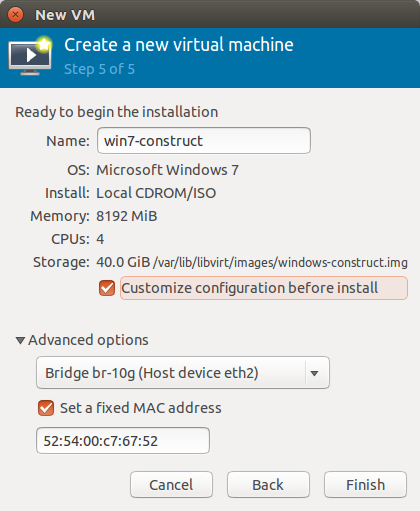
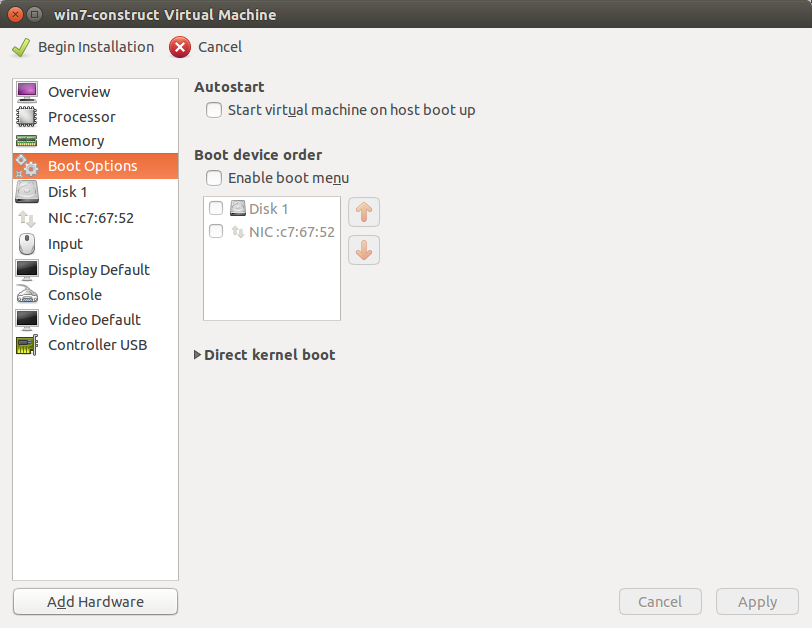
Name the VM. Make sure it is set up on the host’s eth2 bridge, and opt to customize configuration before install. Click Finish.
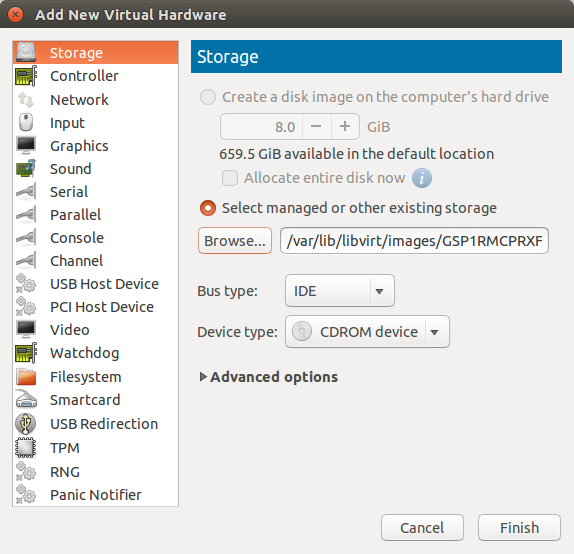
There are several post-config steps. First, click Add Hardware.
Select the storage option. Select the Windows install ISO from manged storage and ensure that it mounts as a CDROM with an IDE bus. Click Finish.
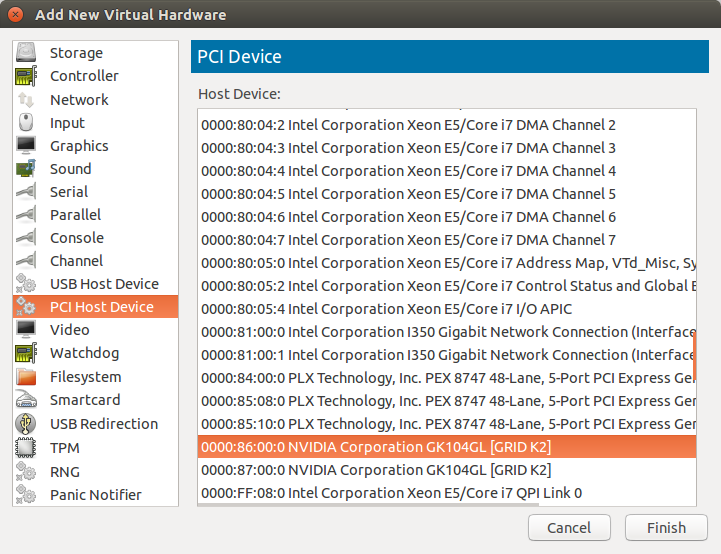
Select Add Hardware again. Select PCI Host Device. Navigate to one of the grid cards and select it. Be very careful that no other VMs are using the card. Click Finish.
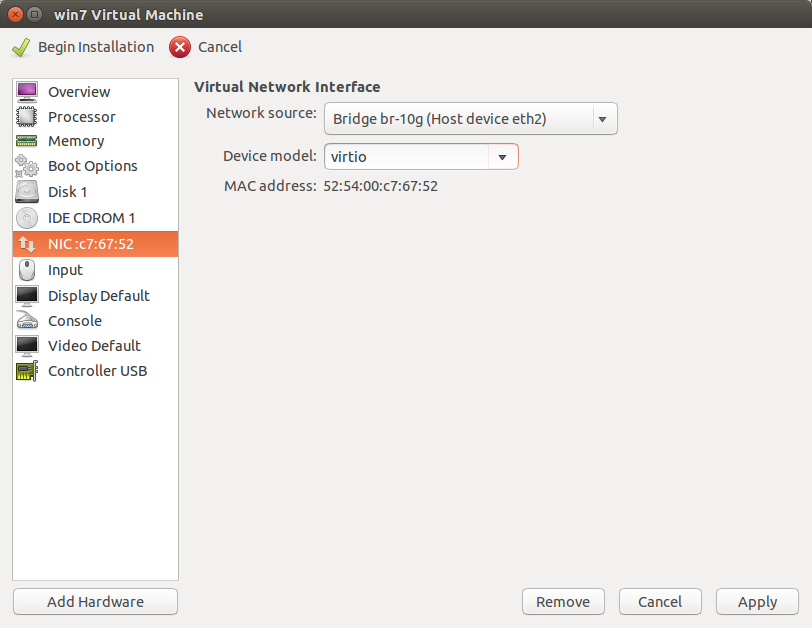
Within the list of already configured devices, navigate to the NIC. Set its device model to virtio.
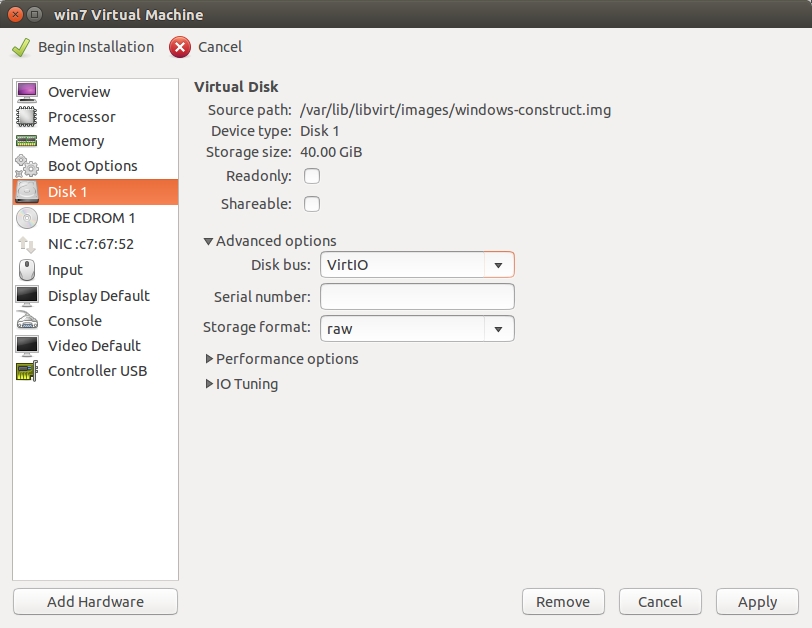
Do similarly for the hard disk. Set its bus to VirtIO. Click Apply and begin installation.
Windows Installation
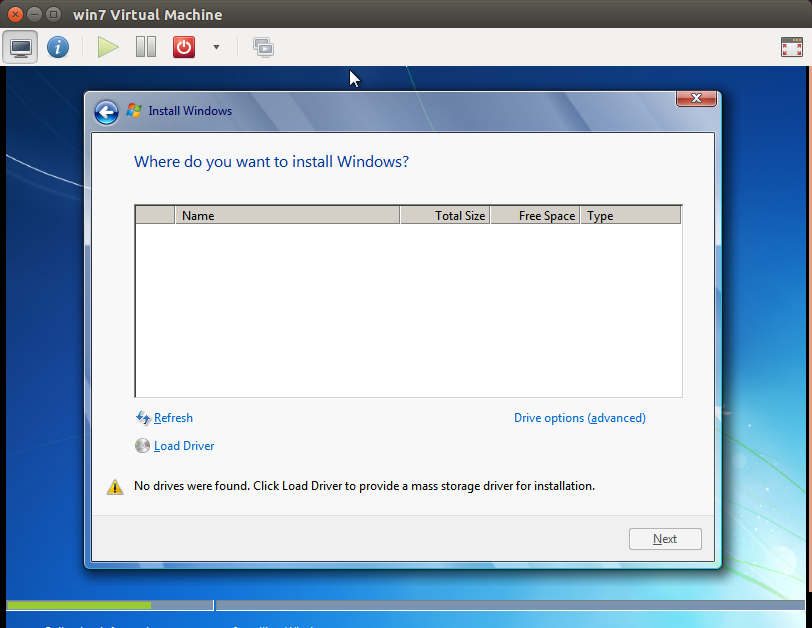
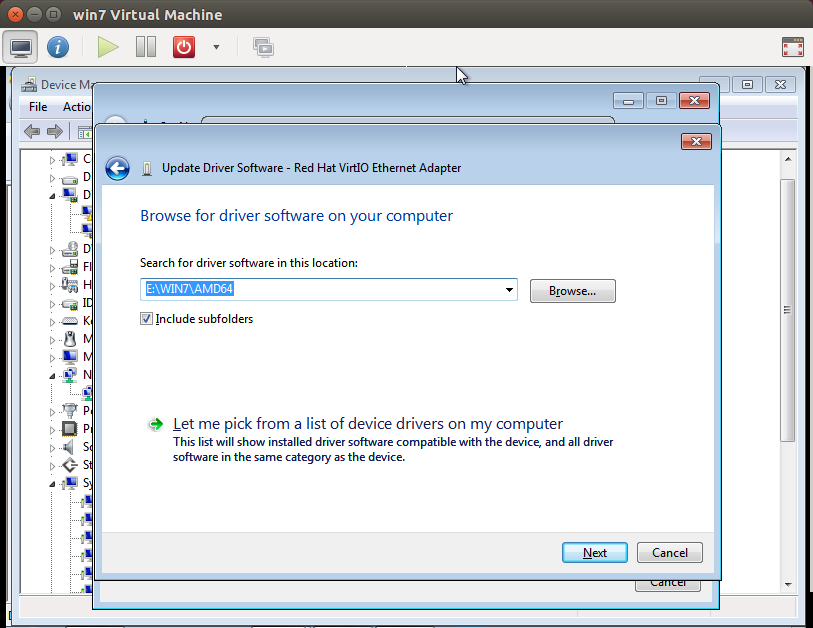
Partway through the Windows installation, when you would be prompted to select a drive, the installer will complain that no drives were found. Here, you will need to load the drivers necessary to see and use the attached virtio drive.
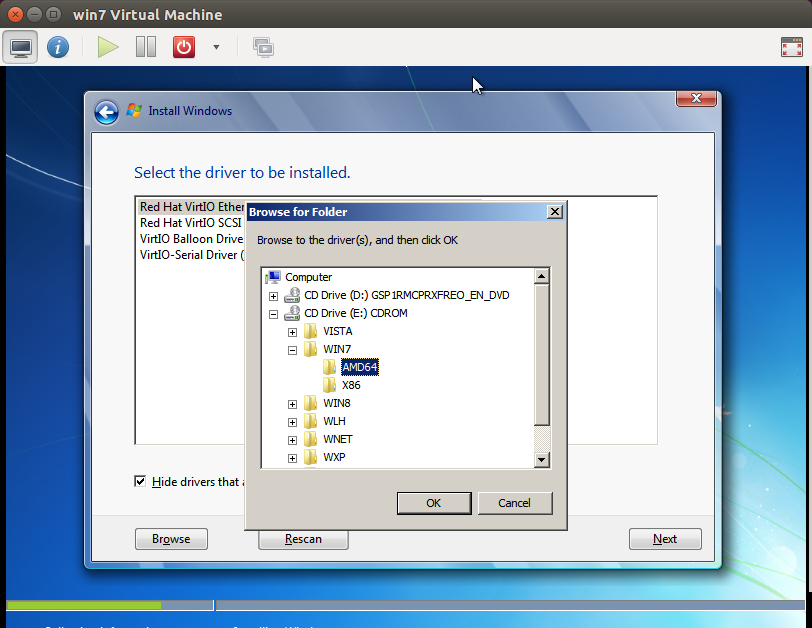
Browse to the virtio CDROM and navigate to the AMD64 directory under the proper version of Windows, i.e. E:\WIN7AMD64. Select it and click OK.
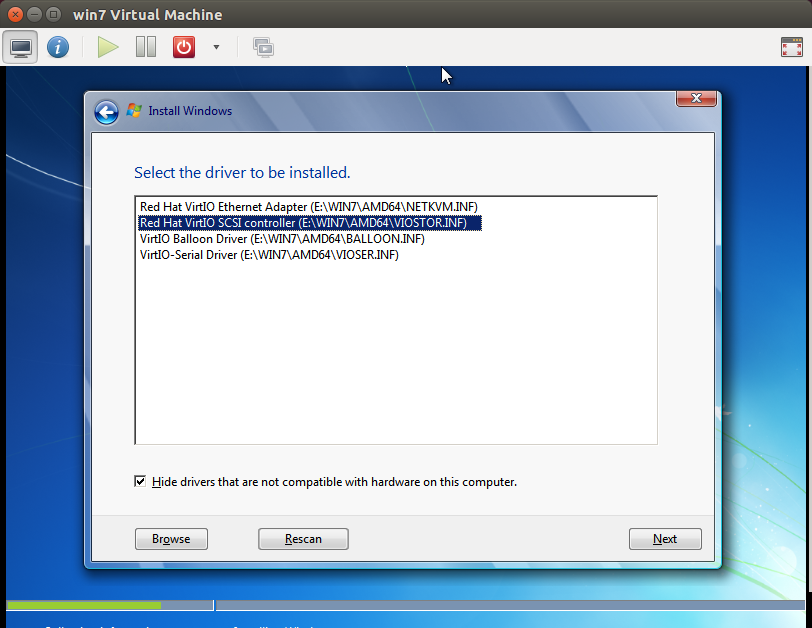
Select the Red Hat VirtIO SCSI controller driver. The disk you created in the initial setup will now appear, and you can continue the rest of the installation normally.
Post-Installation
Log into Windows. Open the Device Manager. Wherever you see a device without a functioning driver which will be marked by a yellow exclamation point, open it unless it is a graphics device.
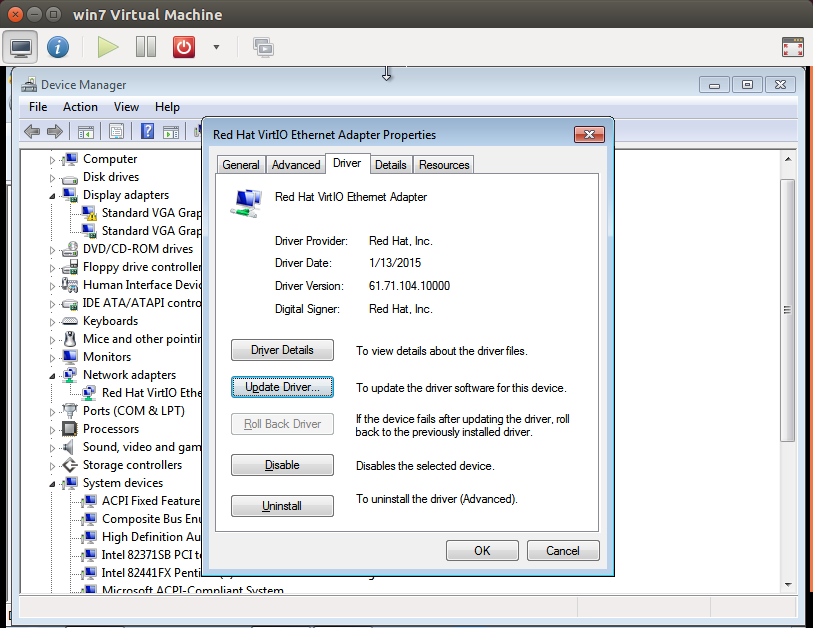
Choose to browse locally for an appropriate driver. Navigate to the same folder on the driver install disk you selected for the initial install.
Open a command prompt with Administrator privileges. Set a static IP for the default Local Area Connection on the vmhost’s bridge with the following command:
# netsh interface ip set address name="Local Area Connection" static [Instance IP Address] [Bridge Netmask] [Bridge default gateway]
Configure Windows update and bring your installation up to scratch. This will take a great deal of time.
You should now be able to reach the Internet through a web browser.
- Start powershell and run
Set-ExecutionPolicy Unrestricted. - Download, install, and configure WinSCP.
- Download Cloudbase’s cloud-init for Windows.
- Using WinSCP, download the NVIDIA sdk drivers and the SCW installer from the vmhost.
- Install the latest 1.0.2 version of Win32 OpenSSL - https://slproweb.com/products/Win32OpenSSL.html
- Install SCW.
- Configure SCW using the SCW User Guide - http://www.penguincomputing.com/documentation/scyld-cloud-workstation/user-guide/
- Install the NVIDIA drivers, but postpone restarting.
- Install cloudbase-init.
- When prompted to run sysprep, do so.
Postpone shutting down again.
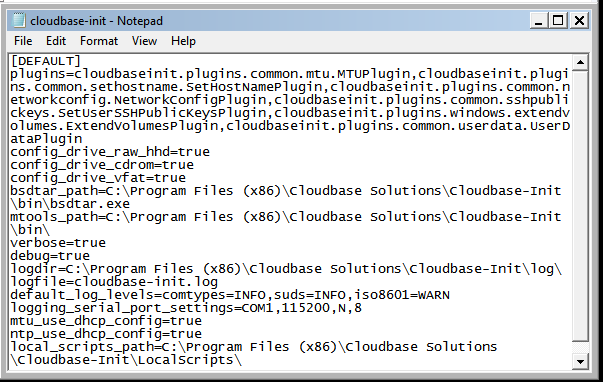
Open cloudbase-init’s configuration directory at
C:\Program Files (x86)\Cloudbase Solutions\Cloudbase-Init\conf.
You’ll need to disable the utility’s CreateUser and SetPassword plugins.
To do so,
add a plugins= line to both the
cloudbase-init.conf
and
cloudbase-init-unattend.conf
files specifying which plugins are to be loaded and run, excluding those
plugins.
See the working list in the following screenshot.
Openstack Integration
Shut down the instance from within it, and from the vmhost, copy the VM’s backing disk file to the controller via SCP. Save the disk image on the vmhost for later use.
root@vmhost3:~# scp /var/lib/libvirt/images/windows-construct.img cc1:/root/
Import the disk file into glance on the controller.
# glance image-create \
    --name WindowsUpdatedLoginNode \
    --disk-format raw \
    --container-format bare \
    --min-disk 80 \
    --min-ram 8192 \
    --file ./win-construct.img \
    --is-public True \
    --progress \
    --property active=true \
    --property image_type=loginnode \
    --property service_url='https://{}/' \
    --property hw_video_model=qxl
Create a cinder volume from the resultant glance image.
# cinder create \
    --image-id $(glance image-list | awk '/WindowsUpdatedLoginNode/ {print $2}') \
    --display-name "WindowsLoginVolume" \
    80
If you want to use RDP as well as SCW, make sure the SCM cloud controllers have the openstack.allow_rdp setting as True.
Ensure that the flavor you want can contain the volume you created, and if using GPU acceleration, that it asks for a graphics card.
# nova flavor-show 8
+----------------------------+----------------------------------------+
| Property                   | Value                                  |
+----------------------------+----------------------------------------+
| OS-FLV-DISABLED:disabled   | False                                  |
| OS-FLV-EXT-DATA:ephemeral  | 0                                      |
| disk                       | 40                                     |
| extra_specs                | {"pci_passthrough:alias": "K2_Grid:1[a]"} |
| id                         | 8                                      |
| name                       | scm-k2.4x1                             |
| os-flavor-access:is_public | True                                   |
| ram                        | 1024                                   |
| rxtx_factor                | 1.0                                    |
| swap                       |                                        |
| vcpus                      | 4                                      |
+----------------------------+----------------------------------------+
Boot an instance from the volume you created above. Be sure to specify a keypair.
# nova boot \
   --flavor 8 \
   --key-name default \
   --meta admin_pass=Penguin \
   --block-device-mapping \
      vda=$(cinder list | awk '/WindowsLoginVolume/ {print $2}'):::0 \
   Windows_Instance
Associate a floating IP with the instance if one is not automatically assigned.
# openstack floating ip create

# openstack server add floating ip Windows_instance 10.110.20.32
Connect via SCW or RDP if enabled. The password you used during install should have persisted. Verify that the instance is aware of the card by opening Device Manager. If everything is working at this point, you’re good to go.
Creating New Login Node Templates
Unlike with Centos Login Nodes, we can’t run virt-sysprep and similar
utilities on Windows disk images, so our usual routine of exporting the
cinder volume of an instance where we’ve made the changes will not work.
Instead, save the initial libvirt disk-image you created in the initial
installation. If you need to make any changes that you wish to appear on
all spawned instances, spin up the libvirt instance in virt-manager in
safe-mode, make the changes, shut down, and repeat the import steps detailed
in the previous sections.